Pic: Hackney Radical History
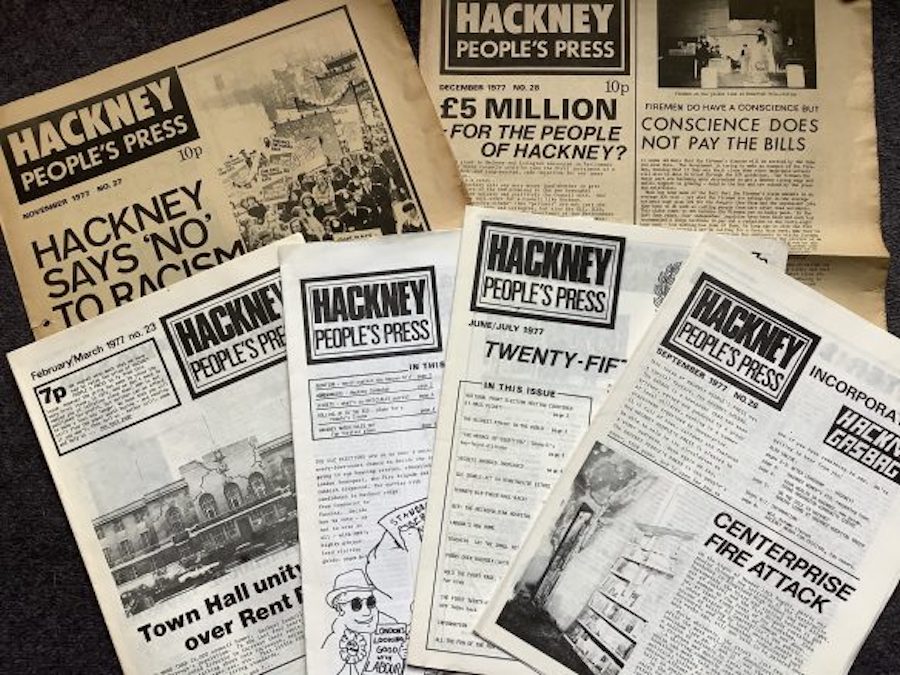
A year or two ago I decided to donate a number of files relating to Hackney People’s Press to the London Borough of Hackney’s archives. These had been sitting in my attic for a long time. I’m now helping the good people who work for the archives go through the files, particularly the photographs, identifying subjects and providing key words. This is a precursor to annotating all the copies of the paper which are held in the archives, and making them available to the general public.
I’ve also recorded an interview for the oral history section, which will be published in due course. While doing this, I was asked about the production process and specifically about pasting up artwork. I gave a brief explanation, which will probably sound very confusing when it is replayed. Later, I went looking online for information about how this was done and couldn’t find anything very useful. However, I knew that I had written something about the subject in my book, Editing, Design and Book Production, which was published by Journeyman in 1993. I had written the first draft of this part of the text some five or six years before this date so, as it turned out, pasting up artwork had become almost an anachronism by the time the book was published.

I pulled a copy of the book down from the shelf, and read through the text. I thought about scanning the relevant pages and posting it as a PDF. But I recalled that Journeyman had once sent me the finished QuarkXPress files, and that I had them in an old archive on one of my back up external hard drives. They weren’t too hard to locate, but my InDesign CS4 software wouldn’t open them. So, no expense spared, I sent the files over to Markzware in Holland. A small sum of money changed hands and the very helpful David Dilling sent back an InDesign file an hour later.

You can see a converted spread from the book above. And I was able to import the text on paste up into a new post for the blog. It’s unchanged from the published text, so please follow all current health’n’safety guidelines.
Doing your own artwork: a 1980s guide
Equipment
If you decide to paste up your own artwork you will find it a lot easier with a small amount of specialist equipment, which you can find in any graphic or artist’s supplies shops. What people find most useful varies from person to person, but what I use is the following:
• Scalpel blades and blade holder. Swann-Morton 10a blades are the most useful shape. They fit into a No. 3 holder.
• Steel straightedge or ruler. It is worth buying a metal typescale which you can then use both for cutting against and for measuring type.
• Clear plastic ruler embossed with a parallel line grid. An 18 inch or 24 inch ruler is useful, since you may need to draw accurate lines longer than 12 inch.
• Suitable adhesive. The aerosol Spraymount is often used, but can be rather messy and is dangerous to health if your workplace is not well ventilated. Professional studios use hot wax, but the cheapest hand-held dispensers cost over £50. Cow Gum (a rubber solution, not made from cows!) is often regarded as old fashioned, but I find it the simplest substance to use, especially if it is applied from a tin, not a tube, with a thin metal artist’s palette knife rather than the plastic tool made by the manufacturer.
• Metal palette knife.
• Large set square. Either 45 or 60 degrees will do.
• Light-blue pencil. For drawing lines on artwork which will not show up when it is photographed by the printer. Do not go to the expense of buying special ‘non-reproducing’ pencils – any light-blue crayon will suffice.
• Very fine steel-tipped black pen, with a 0.1 or 0.2 mm point. There are plenty of inexpensive pens on the market which are just as good for occasional work as specialist refillable drawing pens. These are expensive, usually messy to fill and tiresome to keep clean.
• White-out fluid. Preferably a new bottle with a nice fine brush!
With these tools, a decent flat table, some plain white heavy card and scrap paper, you should be able to manage any paste-up. A specialist self-healing cutting mat is not essential but is quite useful, since it can be used as a base on which to work on your table.
Designers usually use a drawing board with a parallel motion in order to produce accurate squared-up artwork. You do not need to obtain such an expensive piece of equipment if you are only going to do small amounts of work, but you might want to consider it.
How to Paste Up
The most important thing about paste-up is to get everything straight and squared up. In order to ensure accuracy, professional designers will often get accurate grids preprinted in pale blue for them to paste onto. You might like to consider this if you have a large book to do. Alternatively you can purchase preprinted grids in standard formats such as A4 and A5 from some designers and printers. If you are going to use a standard grid, plan your design around it.
For a short book or pamphlet it will probably be sufficient to draw up your own grids in light-blue pencil on plain white card. You can also paste up onto heavy tracing paper (available in art shops) so you can draw up grids more quickly by tracing them off a master copy. The edge of the page should be signified by corner marks drawn in fine black pen.
Your paste-up can be done as spreads to appear the way they will appear in the final book or pamphlet – in other words, with p.2 facing p.3, and so on. The printers will make them up to the correct ‘imposition’ to fit their printing and binding machinery.
The typematter which you are going to paste up will probably be in galley form. Before beginning the paste-up of each spread, cut out the typematter for each page from the galley with a scalpel and steel rule, leaving a small margin (about 3 to 5mm) around the edges. Any other elements for the spread which have been set or supplied separately, such as headlines, chapter headings, subheadings, illustrations or figurative matter, should also be cut out.
Place all the matter down ‘dry’ on the grid, to check everything fits and then begin the paste-up from the top of the page. Place each piece to be pasted in turn upside down onto scrap paper and ensure the adhesive is spread evenly in a thin film up to each edge. Pick up the pasted piece carefully with the spreader and place it onto the grid in the correct position. Adhesives such as Cow Gum, Spraymount or wax do not solidify immediately, so the piece can be moved around for about 30 seconds, which gives you time to check whether it is positioned and squared up correctly with a ruler with a parallel line grid or a set square. When the piece is accurately positioned, place a piece of plain white paper over it and gently press it down to the surface.
If you make a mistake, don’t worry. You can lift pieces off the surface for up to about 10 minutes by prising them gently away with a palette knife. After this time, you may need to soften the adhesive by flooding the area with some petrol lighter fuel, which is sold for this purpose in art supply shops. Don’t smoke while doing this!
When you have finished each grid, clean up any marks either with a little lighter fuel on a tissue or with a little ball of solidified Cow Gum, which pulls any surplus gum off the surface. Use white-out fluid to cover anything that won’t clean off in this way.
This description of paste-up is rather brief. Once you have tried it, you will find that it is largely a mixture of practice and confidence – plus the ability to see whether what you have done looks both straight and squared up.
_______________________________________
© Charles Foster, 1993 and 2021. May be copied under a Creative Commons licence but please acknowledge source.
